Custom Enamel Pins: The Complete Guide for Singapore Businesses (2026)
In a world where attention disappears in seconds, enamel pins cut through the noise. They’re tangible, personal, and something people actually keep and display—on bags, jackets, lanyards, and desks. That’s why brands use them to build loyalty, spark community, and create campaigns people remember.
This guide breaks down how custom enamel pins are made, the choices involved, and how to get the most branding impact from them.
Table of Content
Materials - Learn about the metals, enamel types, and platings used to make enamel pins, and how they affect finish, durability, and cost.
Sizes - Find the right balance between size, detail, and budget when planning your enamel pin design.
Designing - Avoid common design issues by learning how enamel pins are structured and prepared for production.
Attachments & Backings - Find the right attachment option depending on where the pin will be worn and how it will be used.
Packaging & Backing Cards - Use backing cards and packaging to turn your pin into a complete brand experience.
Pricing - Understand what drives enamel pin pricing and how to plan your budget wisely.
How to Order Enamel Pins - Follow a simple step-by-step process to plan, produce, and deliver your custom enamel pins with confidence.
Production Timeline - Understand the production timelines involved so you can plan your campaign without last-minute surprises.
1. Materials
Choosing the right materials is a key part of designing a custom enamel pin. From the base metals used to shape the pin, to the plating that controls the final finish, and the enamel type that determines texture and detail—each material choice impacts cost, durability, and appearance. Understanding these basics will help you decide which combination works best for your brand, artwork style, and budget.
Types of Enamel Pins
Before choosing the right enamel pin for your campaign, it’s important to understand the different types available. Each type offers a distinct look, level of detail, texture, and price point. From budget-friendly options for mass giveaways to premium finishes for awards or retail collections, the style you choose should match your purpose, artwork complexity, and brand personality.
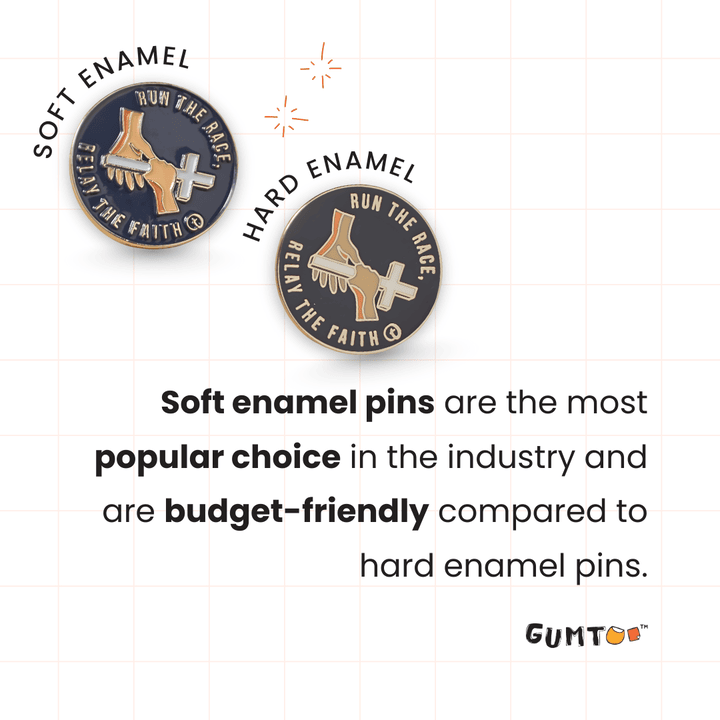
Soft enamel pins are the most popular choice in the industry because they’re affordable ,offer great detail and colour options, and have a textured finish people love. To protect your pins, a clear resin dome can help which is called epoxy pins.
Hard enamel pins come next when brands want a smooth, premium look for awards or retail-quality merchandise.
Antique pins: die-struck pins for a classic metal-only finish, die-cast pins for 3D sculpted shapes like mascots.
Sandblast pins for a matte-versus-gloss contrast. For artwork that can’t be created with coloured enamel.
UV-printed pins allow high-resolution printing directly on the pin surface, perfect for fine details, tiny text, and complex colour blends. These specialty formats deliver creative flexibility but are typically more expensive than soft enamel for large promotional runs.
Epoxy pins are not enamel pins. They are used when a design includes gradients, shadows, fine details, or photographic artwork that cannot be created with enamel filling. The design is printed directly onto the metal surface and sealed with a clear epoxy dome for protection and a smooth, glossy finish. In the industry, these are technically called photo dome lapel pins, though they’re commonly referred to as epoxy pins.
2. Standard Plating
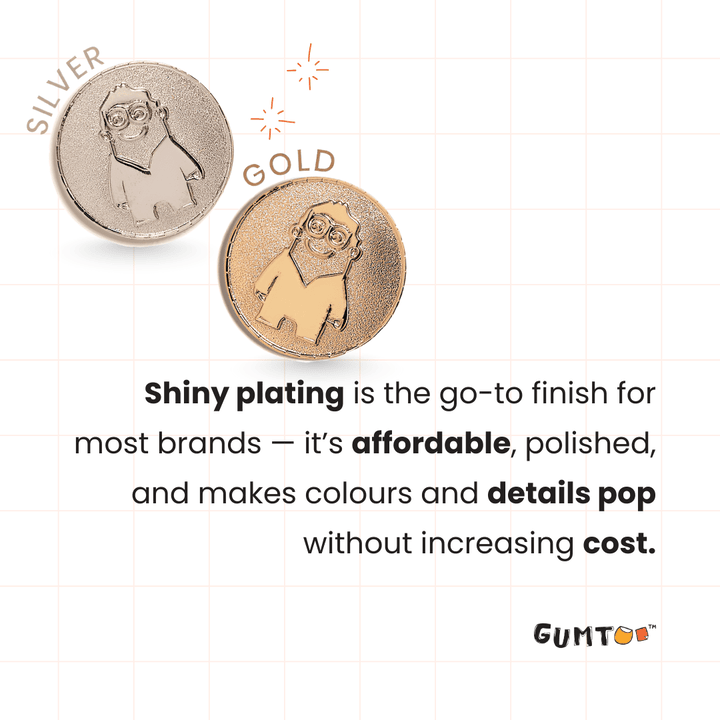
Every pin needs a plating — it’s what protects the metal and completes the design. You’ve probably heard of gold plating, silver plating, or even black nickel. They fall under different categories. For soft enamel pins, shiny plating is the most popular and budget-friendly option. It’s bright, reflective, and polished — making colors pop and details stand out. You can choose from gold, silver, rose gold, or black nickel for different moods and styles.
If you’re after a more vintage, premium finish, go for antique plating. It creates a subtle contrast between raised and recessed areas, adding depth and character to detailed designs.
For something bold and exclusive, dual plating (like gold and silver in one pin) delivers a striking two-tone effect. It’s a high-end choice often reserved for limited-edition or collector pins, as it requires more craftsmanship and comes at a higher cost.
Special Plating (Soft Enamel Only)
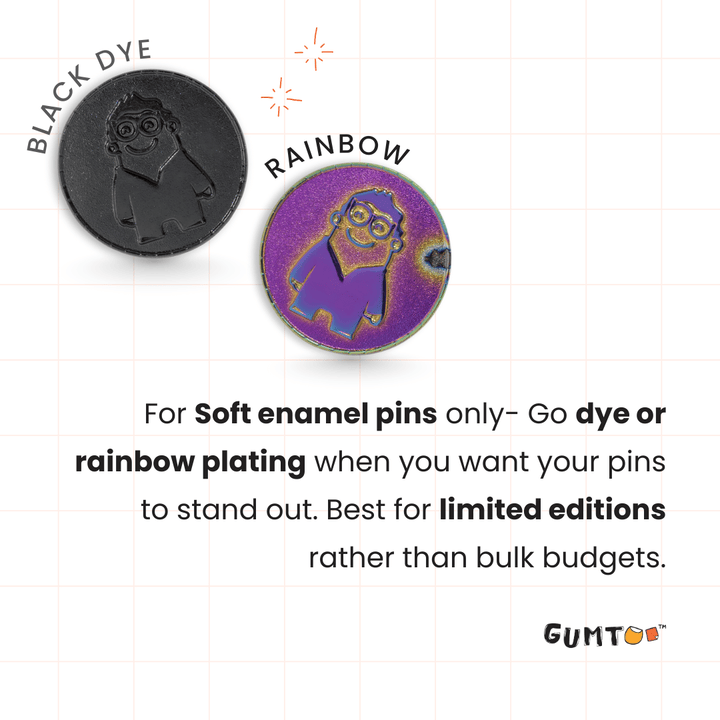
Specialty plating for soft enamel pins includes coloured dye plating, which replaces metal with solid colour for a clean, modern look; it costs slightly more than standard shiny plating due to the custom finish. Rainbow/anodized plating creates an iridescent colour-shift effect for standout, collectible designs, but it’s one of the pricier options and less suited for large budget-friendly runs.
Although, epoxy on soft enamel pins are possible. It’s a clear resin layer can be added over soft enamel pins to improve durability and create a smooth, glossy surface similar to hard enamel.
3. Add Ons & Finishes
Beyond the basic pin type and plating, special add-ons and finishes can elevate the look, feel, and purpose of your enamel pins. These enhancements help you customize your design further—whether you want more sparkle, movement, branding space, or a premium collector effect. Depending on budget and campaign goals, you can choose from simple upgrades that keep costs low to high-impact features for limited editions and retail-quality projects.
Glitter adds sparkle and texture within the enamel and is ideal for bold artwork; it typically costs a bit more than standard enamel but is still manageable for bulk orders.
Glow-in-the-dark pins uses phosphorescent fill that charges under light and glows in the dark — a fun upgrade with only a small cost increase, making it bulk-friendly.
Translucent enamel creates a glass-like depth that reveals the metal beneath; it gives a premium look and sits in the mid-range cost tier.
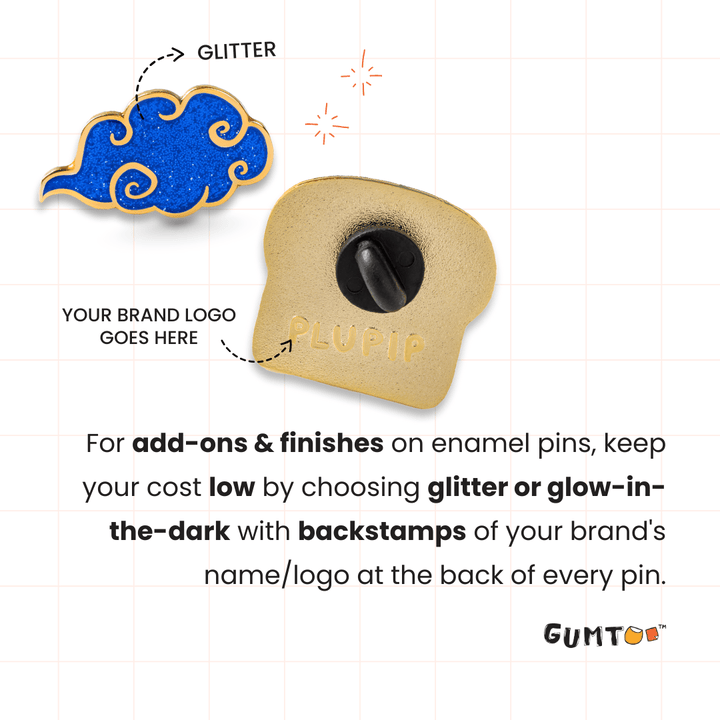
Backstamps and laser engraving are low-cost add-ons perfect for bulk production, allowing branding or numbering on the back.
Interactive elements like spinners, sliders, fidget parts, or magnets require more complex construction and are the most expensive option, typically reserved for limited editions rather than large promotional quantities.
2. Size & Shape

Most pins range between 0.75 to 1.5 inches.
Smaller pins (0.75 inch) suit simple logos or lapel badges.
Larger pins (1.5 inches or more) work best for intricate artwork or detailed designs.
Non-standard or irregular shapes require more complex molds and may increase costs. Avoid too many internal cutouts—they weaken the pin and complicate production.
3. Designing an Enamel Pin
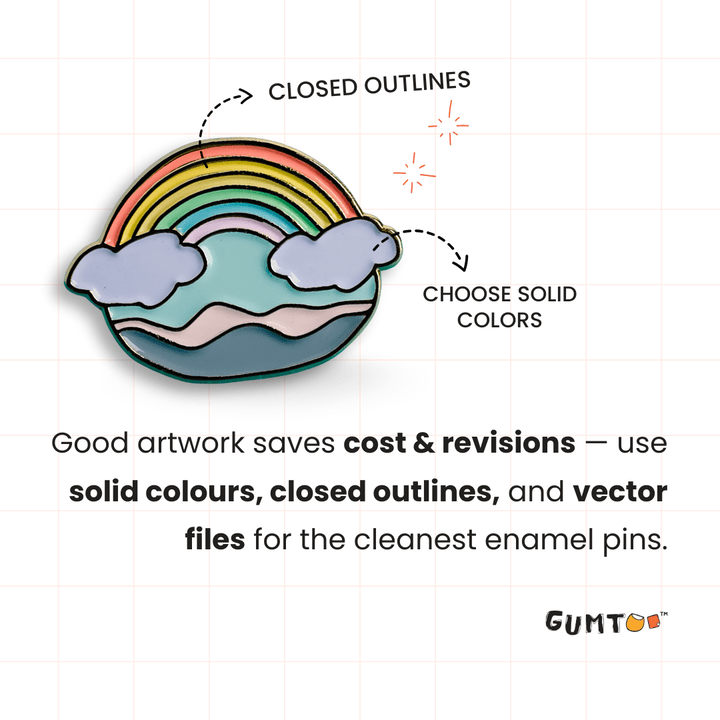
Every enamel pin starts as a metal base with recessed areas filled with colored enamel. These recessed sections are contained by raised metal outlines that define each color.
To ensure a clean finish, all lines must be closed, as open outlines can cause enamel to overflow or mix.
Minimum metal line thickness: 0.2 mm
Minimum enamel-filled area: 0.3 mm
Color & Metal Outlines
Each enamel color must be separated by a metal line, which acts as a barrier to hold the enamel.
Use solid colors only; gradients can’t be achieved with enamel.
For designs with gradients or photo effects, consider epoxy photo dome or UV-printed pins instead.
Keep color count between 1–8 colors for smaller pins and up to 12 colors for larger pins (2 inches or more).
Provide Pantone (PMS) color codes to maintain color accuracy during production.
2. Artwork Setup
Always supply your artwork as a vector file (.AI, .EPS, or .SVG). Vector artwork ensures crisp lines and accurate scaling. If you’re unsure, manufacturers can help refine or convert your design for pin production.
Pro tips:
Simplify intricate elements and avoid overly thin lines.
Add depth or fine details through printing or laser engraving if needed.
Convert text to outlines to avoid font compatibility issues.
3. Mock-up & Testing
Before full production, request a digital mock-up and physical sample to review color accuracy, metal plating, and finish. This helps identify any design adjustments early.
4. Attachments & Backings
Your choice of attachment affects how securely the pin stays on clothing or accessories and influences the overall user experience.
For most enamel pins, the butterfly clutch (military clutch) is the most popular and cost-effective backing, making it the standard choice for bulk orders and everyday use on bags, lanyards, and uniforms. Rubber clutches are another common option, especially for wearable pins on apparel since they’re soft and skin-friendly, with minimal cost difference.
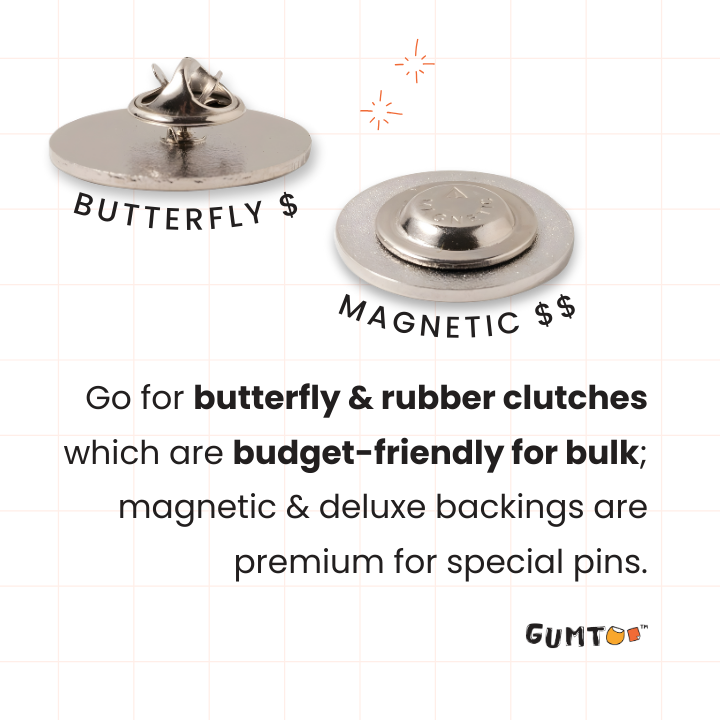
Magnetic backings offer a fabric-safe alternative without piercing material, but they’re more expensive and better suited for premium gifting or delicate clothing; double magnets are typically used only for heavier pins. For larger or brooch-style pins, safety/bar pin backs remain a reliable choice at a reasonable price.
Deluxe clutch and screw-post (tie-tack) backings are the most premium and secure options, but they’re less common for bulk due to higher cost and are mainly used for corporate awards or collector pieces.
5. Packaging & Backing Cards
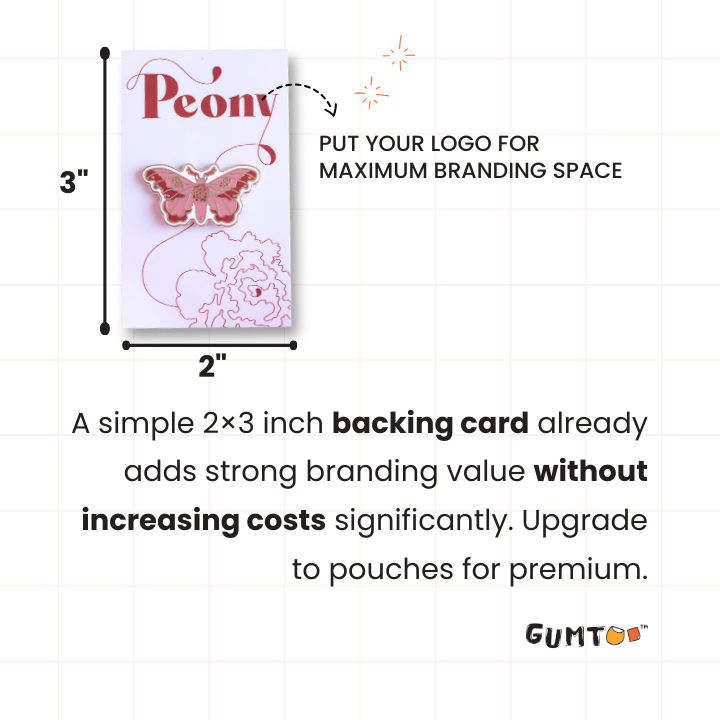
Presentation matters almost as much as the pin itself — especially when it comes to corporate gifting or collector editions. Backing cards not only protect your pins but also serve as an additional branding space that elevates the overall experience.
A good Backing card should:
Measure around 2×3 inches (vertical or horizontal) or 2×2 inches for smaller pins.
Be printed on thick 0.5 mm card stock for durability.
Feature your logo, website, and social media handles prominently.
Include a short brand story, event tagline, or cause description to add context.
Add a personal note or call to action on the back — such as a thank-you message or a prompt to share photos online.
For packaging, choose what fits your event and audience:
Polybags — simple and affordable for bulk giveaways or trade shows.
Velvet pouches — add a soft, premium touch.
Custom gift boxes — ideal for VIP gifting or limited-edition releases.
Together, thoughtful packaging and well-designed backer cards make your enamel pins feel intentional, memorable, and gift-ready.
6. Pricing
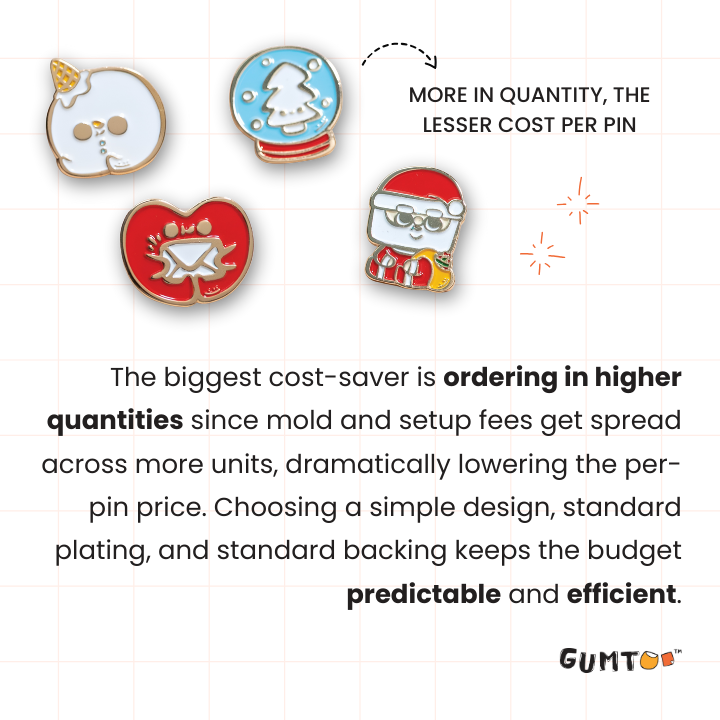
The cost of custom enamel pins depends on the choices you make — from size and materials to plating, colours, and extra finishes. In general, soft enamel pins offer the most budget-friendly option, making them ideal for large promotional campaigns, while hard enamel and specialty effects sit at a higher price tier due to additional polishing and production steps. Ordering in larger quantities also reduces the cost per piece, since mold and setup fees are spread across more units. Understanding how these factors influence pricing helps you plan a campaign that fits both your design vision and your budget.
7. How to Order Custom Enamel Pins
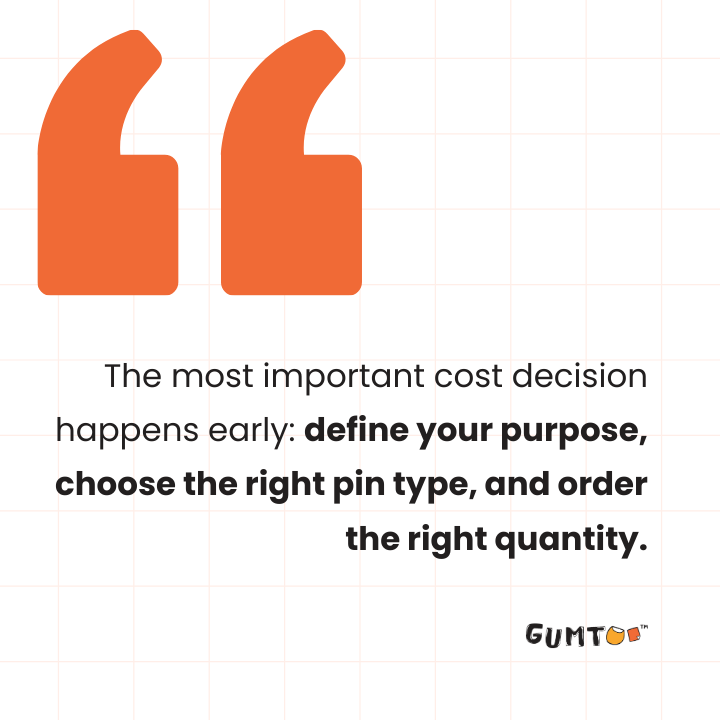
Step 1: Define Your Purpose & Budget
Decide if your pins are for recognition, giveaways, or fundraising. Set a budget and quantity — most suppliers have a minimum order of 100 units, and ordering more lowers the per-unit cost.
Step 2: Choose Pin Type & Finish
Select soft enamel for colorful, cost-effective designs or hard enamel for smooth, premium pins. Pick your plating (gold, silver, antique, etc.) and add any special effects like glitter or glow.
Step 3: Prepare Artwork
Share a vector file or sketch with Pantone color references and size details. Manufacturers can refine your artwork, ensuring correct line thickness and color separation for production.
Step 4: Select Attachments & Backings
Choose a backing (butterfly, rubber, magnetic, or deluxe) and pair it with branded backer cards or boxes to enhance presentation.
Step 5: Approve Proof & Produce
Review a digital or physical sample before mass production. Soft enamel pins typically take 2–3 weeks, while hard enamel may take 4–6 weeks due to extra polishing.
Step 6: Recieve & Distribute
Inspect your pins on arrival and package them with storytelling or thank-you notes. Encourage recipients to share photos online to extend your brand’s reach.
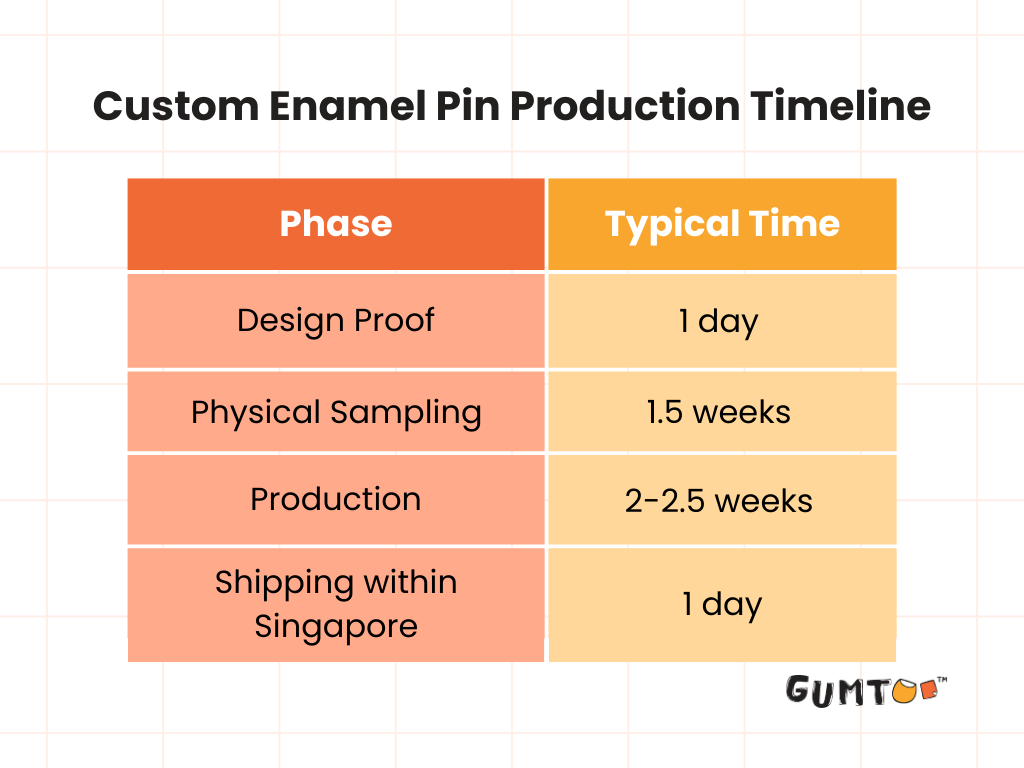
8. Production Timeline
The production timeline for enamel pins generally includes three stages: design approval, sampling, and full production. Understanding these steps helps you plan launches, events, and campaigns without last-minute delays.
9. Conclusion
Custom enamel pins combine artistry and marketing power in a small, affordable package. By understanding the differences between soft and hard enamel, choosing the right plating and attachments, and following design best practices, you can create pins that resonate with your audience and elevate your brand. Investing in thoughtful packaging and leveraging pins across campaigns will ensure your brand leaves a lasting impression long after the event is over.
10. FAQs
Materials:
Q1: What's the difference between hard enamel pin and soft enamel pin?
A: Soft enamel pins have raised metal edges and recessed enamel areas, giving a textured finish. Hard enamel pins are polished flat and smooth, creating a premium, jewelry-like surface. Additionally, hard enamel pins cost more to the extra polishing required compared to soft enamel pins that are cheaper for bulk order.
Q2: What is the difference between die cast and die struck pins?
A: Die-Struck Pins are made by stamping a design into a sheet of metal, creating raised and recessed areas. They typically don’t use enamel color (unless optionally added) and rely on metal finishes like gold, silver, copper, antique, etc.Best suited for flat designs and smaller pins under 2 inches.Die-Cast Pins are made by injecting molten metal into a mold, allowing for smooth curves, cut-outs, and 3D sculpted shapes. They are great for mascots, characters, complex shapes, or multi-layered depth. They can be used with enamel or left as metal, and work best for larger pins (above 2 inches). Because of the molding process, they may cost slightly more than die-struck for complex designs.
Q3: What size should I make my pin?
A: Most pins fall between 0.75–1.25 inches for apparel and 1.5 inches or larger for bags or display pieces. Smaller pins suit simple designs; larger pins support detail and more colors.
Q4. What are my plating options?
A: Common options include gold, silver, black nickel, rose gold, and antique finishes. Specialty options include rainbow plating, dual plating, and dyed metal colors.
Q5. Can you pantone-match my brand colors?
A: Yes — provide your PMS (Pantone Matching System) numbers for exact color matching during production.
Q6. Do enamel pins tarnish overtime?
A: Enamel pins are made with metal bases and plated finishes. Over time:
Tarnishing can occur if the plating is low quality or exposed to moisture, oils and abrasion — especially for non-gold/silver finishes.
Scratches can happen, particularly on soft enamel pins where raised metal edges and recessed enamel can catch on surfaces. Higher quality hard enamel pins tend to be more scratch-resistant due to their polished, flat surface.
Using quality plating, protective coatings (such as epoxy), and proper storage (backing cards, pouches, boxes) helps reduce tarnishing and scratching, keeping pins looking new longer.
Pricing & Budget:
Q7. How much do custom enamel pins cost?
A: The cost of enamel pins varies depending on size, type (soft vs hard enamel), quantity, and customisation. Smaller soft enamel pins in standard plating are usually the most budget-friendly, while larger hard enamel pins with premium finishes or special effects fall on the higher end. Ordering in bulk significantly reduces per-unit pricing.
Q8. What affects the cost of enamel pins?
A: Pricing is influenced by:
Size — larger pins require more metal and enamel, increasing cost
Quantity — higher quantities lower the per-unit price
Colours — more colours means higher production cost
Plating type — premium platings (dual, rainbow, antique) cost more than standard shiny plating
Special effects — glitter, glow, translucent enamel, epoxy dome, UV printing add cost
Attachments & packaging — magnetic backs and gift boxes are premium options
Q9. What is the MOQ for custom enamel pins? Can I order fewer units?
A: The standard minimum order quantity is 100 pieces per design. While some suppliers may allow lower quantities, the unit price will be much higher, so ordering 100+ is more cost-efficient.
Designs:
Q10. What file format should I provide?
A: Upload vector artwork (.AI, .EPS, or .SVG) or a high-resolution PDF. If you only have a sketch, many manufacturers offer design assistance.
Q11. How many colors can I use in my design?
A: Pins can technically support up to 20 colors, but for typical sizes (0.75–1.5 inches), 1–8 colors is recommended for the cleanest result.
Q12. Can my design have gradiance and small text?
A: Gradients can’t be created with enamel — they require UV printing or epoxy photodome pins instead. Use text 5pt or larger for readability and ensure lines are thick enough to be filled.
Production, Timelines & Deliveries:
Q13. How long does it take to make enamel pins?
A: Production typically takes 2–3 weeks for both soft enamel and hard enamel, plus packaging time if required.
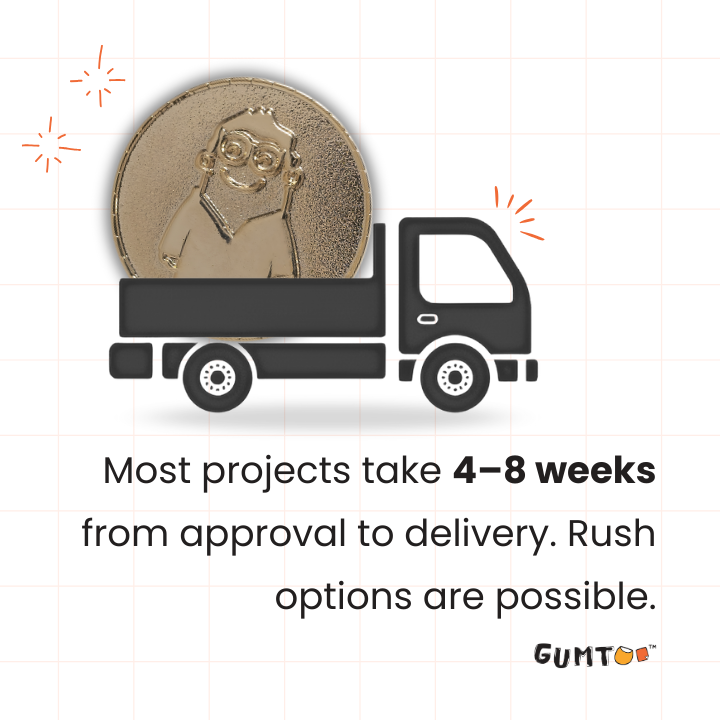
Q14. Can I get enamel pins urgently or on a rush order?
A: Yes. Many manufacturers offer rush service for an added fee. Timelines depend on complexity and shipping method.
Q15. How long is shipping from Singapore / Asia to my country?
A: It depends on your country. On average:
Air freight: 5–10 business days
Sea freight: 25–45 days depending on region
Local Singapore delivery: 1–3 days
Others:
Q16. Which company makes the best custom enamel pins in Singapore?
A: The “best” supplier depends on what your project needs — some prioritise speed, others premium finishes, and others flexibility in design. When choosing a manufacturer, look for:
Strong portfolio of enamel pin styles (soft, hard, die-cast, UV printed)
Clear communication and artwork support
Transparent pricing and production timelines
Ability to handle both small custom runs and large corporate orders
A supplier with experience in brand merchandise, gifting, and corporate campaigns will typically deliver the most reliable results.
Q17. Which manufacturer offers the fastest turnaround?
A: Turnaround time varies by pin type and supplier capacity.
Generally:
Soft enamel produces fastest
Hard enamel and 3D die-cast take longer
Rush services may be available depending on the complexity
If your timeline is tight, choose a supplier that offers clear lead times and optional rush production, and be sure your artwork is finalised early to avoid delays
Q18. Who can make premium hard enamel pins for corporate gifts?
A: Most professional enamel pin manufacturers can produce hard enamel pins, but for corporate gifting, look for a supplier that offers:
High-polish finishing
Premium plating options (gold, rose gold, black nickel, dual plating)
Custom packaging (gift boxes, velvet pouches, backer cards)
Strict quality checks
These factors matter more than the supplier’s name — premium corporate pins require premium finishing standards.
Q19. What are the best enamel pin suppliers for large corporate orders?
A: For large orders, the ideal partner is one who can:
Manage high-volume production without quality inconsistencies
Offer competitive budgeting for 500–10,000+ units
Provide reliable timelines (especially for event deadlines)
Support custom packaging and logistics
Provide artwork refinements for manufacturability
Choosing a supplier experienced in corporate merchandise ensures smoother planning and consistent output across large quantities.