How to design enamel pins
Designing an enamel pin can be tricky if you do not know what the manufacturing limitations are. In this article we will list down a few key points that will help you design a manufacturing-ready enamel pin.
Table of Content
1. Understanding Physical Structure of the Enamel Pin
An enamel pin is made by casting metal using either the die-struck or die-cast method. The design features metal outlines that create empty spaces, which are then filled with colored enamel.
To ensure a smooth manufacturing process, designs must be optimized from the start, as adjustments can be challenging. The key factor in design decisions is the placement of metal lines.
2. Separate Metal Lines
Each color in the pin must be separated by a metal outline, which acts as a container for the enamel. In the example below, the metal outline forms an "S" and is completely closed, ensuring the enamel stays within its designated area without overflowing.
Key Considerations:
Minimum Raised Metal Line Thickness: Metal outlines should be at least 0.2mm thick to maintain structural integrity and proper separation.
Minimum Areas of Color: Enamel-filled areas should be at least 0.3mm to ensure proper filling without defects.
Text Size: To keep text readable, a minimum font size of 5pt is recommended, with simple fonts working best.

Enamel is carefully applied to recessed areas of the ‘S’, creating a smooth finish. ImageSource- Custom Enamel Pin
3. Do not leave Open Metal Lines
Colors must be filled within enclosed spaces, so all lines must be closed. For example, see the design below.
4. Maximum Number of Colors
You can use up to 20 colors for an enamel pin, but it's best to keep it under 12 unless the pin is 2.5 inches or larger.
As a rule of thumb for smaller to medium pins (0.75–1.75 inches), stick to 1– 8 colors. Larger pins (2 inches and above) can accommodate 12–15 colors, but adding more colors increases the cost.
Smaller pins aren't limited to fewer colors. A compact pin with a simple design can accommodate more colors. This digital proof of an enamel pin features 19 colors, with a simplified design to fit them all within a 1-inch size.

5. Do not use gradients
Enamel pins use only solid colors, so gradients must be converted to solid shades.
If a design relies on gradients, it needs simplification before being made into an enamel pin. Alternatively, consider photodome epoxy or UV-printed pins for gradient designs.
In the example below notice the grass, the gradients and the complexity (thin lines, very small elements, brush strokes). If this design was to be coveted into enamel pin the design had to be simplified and metal outlines had to be created. Client however wanted the design as it is. So they opted for a photodome epoxy pin.
6. Size of the Pin
The ideal pin size depends on its intended use.
For t-shirts, blazers, or caps, keep the size small—no more than 1.25 inches. For bags or other visible placements, opt for 1.5 inches or larger to ensure your brand stands out.
For more details, check out our guide on the ideal enamel pin size.

7. Do not use Intricate Lines
For intricate designs, bolden the lines and reduce their number for clarity.
In the example below, notice how the wheels are simplified—image 1 has multiple strokes, while image 2 uses clean, simple lines.

8. Distance between metal lines
For intricate designs, bolden the lines and reduce their number for clarity.
In the example below, notice how the wheels are simplified—image 1 has multiple strokes, while image 2 uses clean, simple lines.

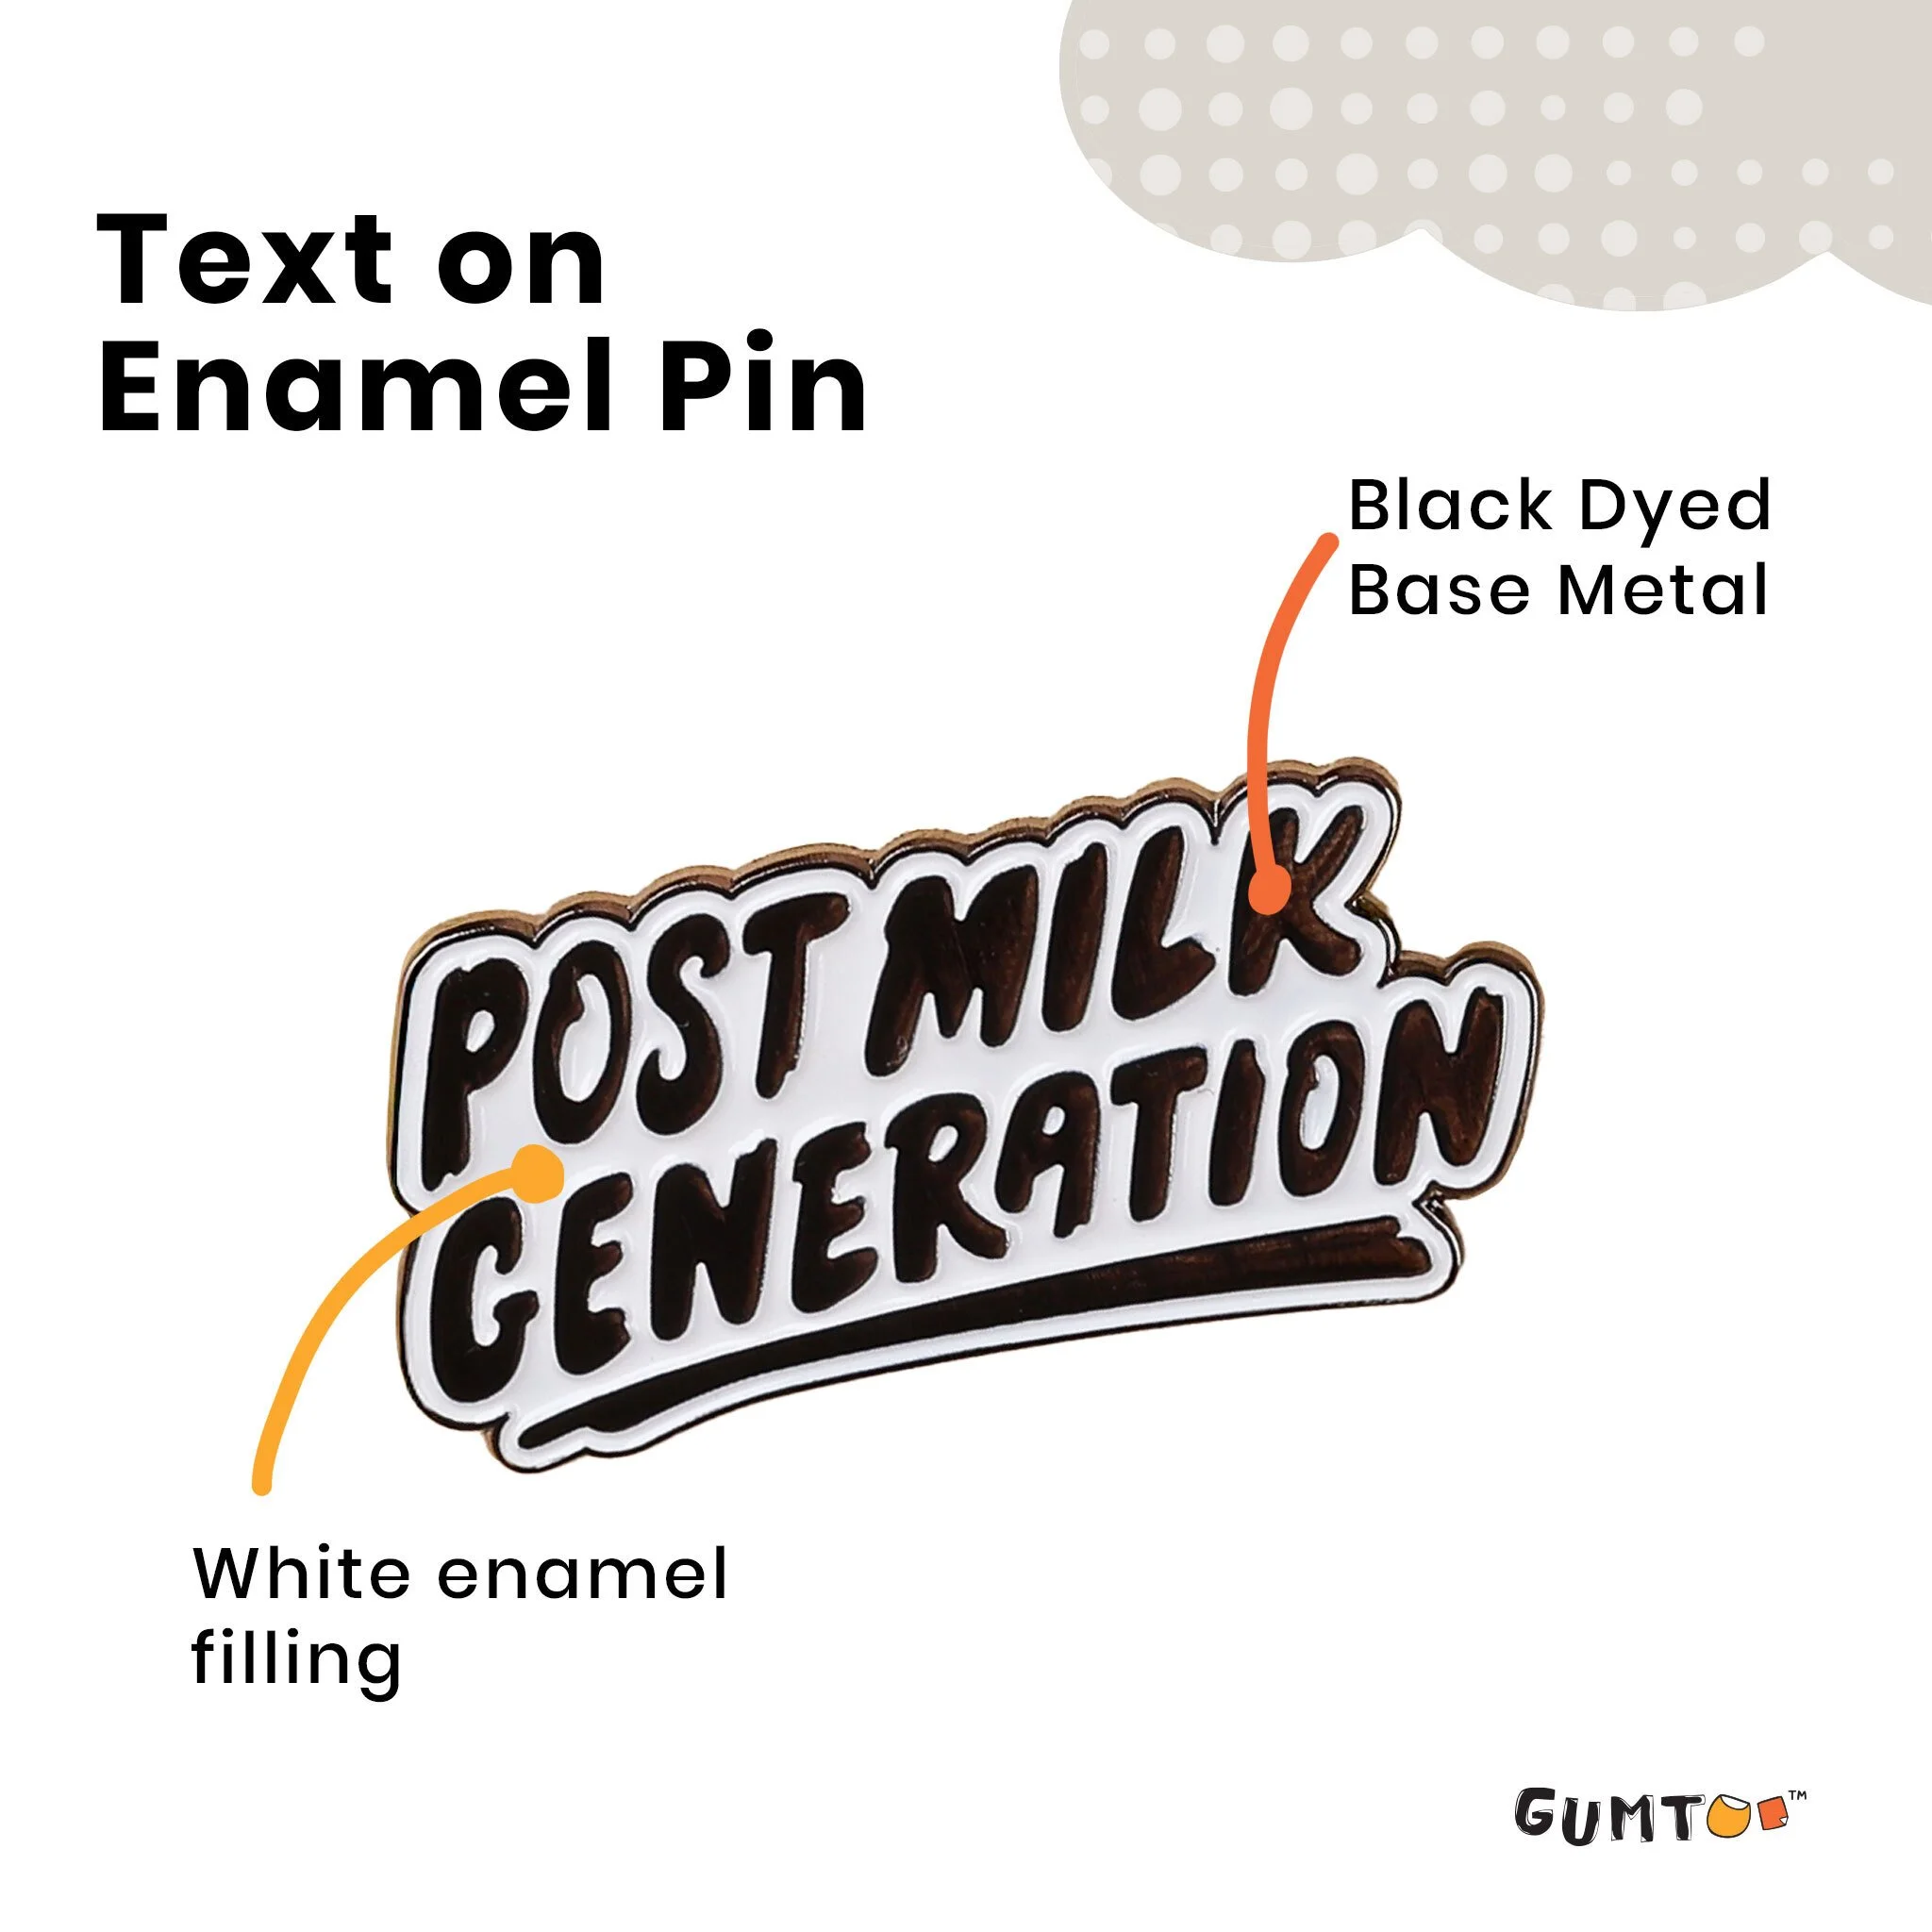
9. Number and Text Should have a Base
For numerals or text in an enamel pin, there are two design approaches:
Use the plated metal for the text/numerals, with enamel filling the surrounding areas.
Ensure the metal outlines create a container for the enamel, as shown in the example below, where the base metal is dyed black and white enamel fills the space.
In this example, the base metal acts as an outline and yellow enamel is filled into it for the text to stand out.
So design as per what you think works out as a design.
10.Software to use
To design enamel pins, use software like Adobe Illustrator, Photoshop, or CorelDRAW. Ensure the final file is in vector format (AI, EPS, or SVG) with pantone colors for accuracy.
Pro Tip: Convert text to outlines to prevent font compatibility issues with manufacturers.